In our last post, we discussed how to get old tiles up before laying new tiles. Today, we’ll talk about the incredibly scientific process we used to lay the new basketweave patterned vct tiles that we decided upon for kitchen.
Once your floor has dried from the soap and water bath, you are ready to move to the next step. Leveling. With VCT tile, we read that any variation in the floor may lead to the tile cracking or shifting, so its very important to start with a nice flat surface. What this amounts to is that basically you fill in any nail holes, cracks between subfloor boards, etc.
Once we removed our old tile, we were greeted by a huge rotted space of subfloor where the refrigerator sits. When we first moved in, there was a gigantic fridge that leaked and smelled & we got rid it of within our first week. We figure that was the likely culprit of the damage.
Instead of replacing all of the subfloor, Kevin took out his circular saw, set it for a very limited depth cut and cut as straight as possible around the damaged area. He then just cut a fresh piece of luan and fit it down into the hole. Then everything was ready to be leveled.
This slideshow requires JavaScript.
As far as leveling goes, we used Ardex Feather Finish cement compound. We mixed up a very small amount to where it was slightly thicker than recommended and filled in all of the holes, divets, ridges, cracks, etc. For example, between the fresh luan and the old subfloor, there was a small gap. I filled the entire gap in with feather finish and then feathered it out so there wasn’t a noticeable ridge. It then just had a small very low-grade ridge. For good measure, we covered all of the old nails and any place where the subfloor had any sort of texture with the feather finish. This whole process took maybe all of 15 minutes and was well worth it.
Once the feather finish dried completely, we laid out a chalk line as our “starting line.” I decided where I wanted our basketweave “to intersect” in relation to the door and then Kevin did whatever magical math he needed to do to decide how that meant the tile needed to be laid. We wanted to lay them at an angle, so we placed our chalk line the longest diagonal point our kitchen had. Once that chalk line was down, we laid out our tile pattern along it and covered the entire kitchen floor. (NO ADHESIVE AT THIS POINT).
Our reasoning for laying out the pattern without adhesive one last time was to ensure we didn’t make any mistakes. Once we had the pattern completely laid out and we were happy with it, we’d pick up one tile at a time and where that tile was Kevin would mark out which tile would go there. It should be noted that the pattern in VCT, while subtle, is definitely directional. The small dots of the pattern move from one side of the tile to the other and it is very noticeable (to me) if from one tile to the next, the pattern switches directions. As a result, he also put an arrow on the floor, denoting which direction the pattern would go. We used “D,” “M,” and “L” to denote dark, medium, and light, respectively. This is a crucial step to the process. Otherwise, you are left to not screw up the pattern once the adhesive is down.

Marking Out Tile Pattern
Next it’s time to trowel out your tile adhesive. Your local home improvement store will sell VCT tile adhesive. Be sure that before you walk out of the store with your chosen adhesive, that you read the back of the bucket. The back of the adhesive will also tell you what size trowel to buy.
Troweling on the adhesive is just what it sounds like. Put your trowel in the adhesive and scoop some out on the floor, then spread it out. If you’ve ever laid any sort of towel before (say, ceramic tile for a backsplash or bathroom), its generally the same thing. Here’s a picture after our floor was covered in adhesive.

In the pic, you can see the trowel marks of the spread adhesive, and also the marked out floor pattern.
The tile adhesive has a really long dry time, giving you plenty of time to lay your tiles correctly. So don’t rush. Carefully lay each tile, butting it up to the next tile and then pressing down hard on to the floor so it doesn’t shift. Once you put it in the tile, you “can” pull it back up and adjust it, but more than likely it’s going to snap if you pressed it into the adhesive. So do it right the first time! Lay every tile carefully so as to avoid having to adjust it.
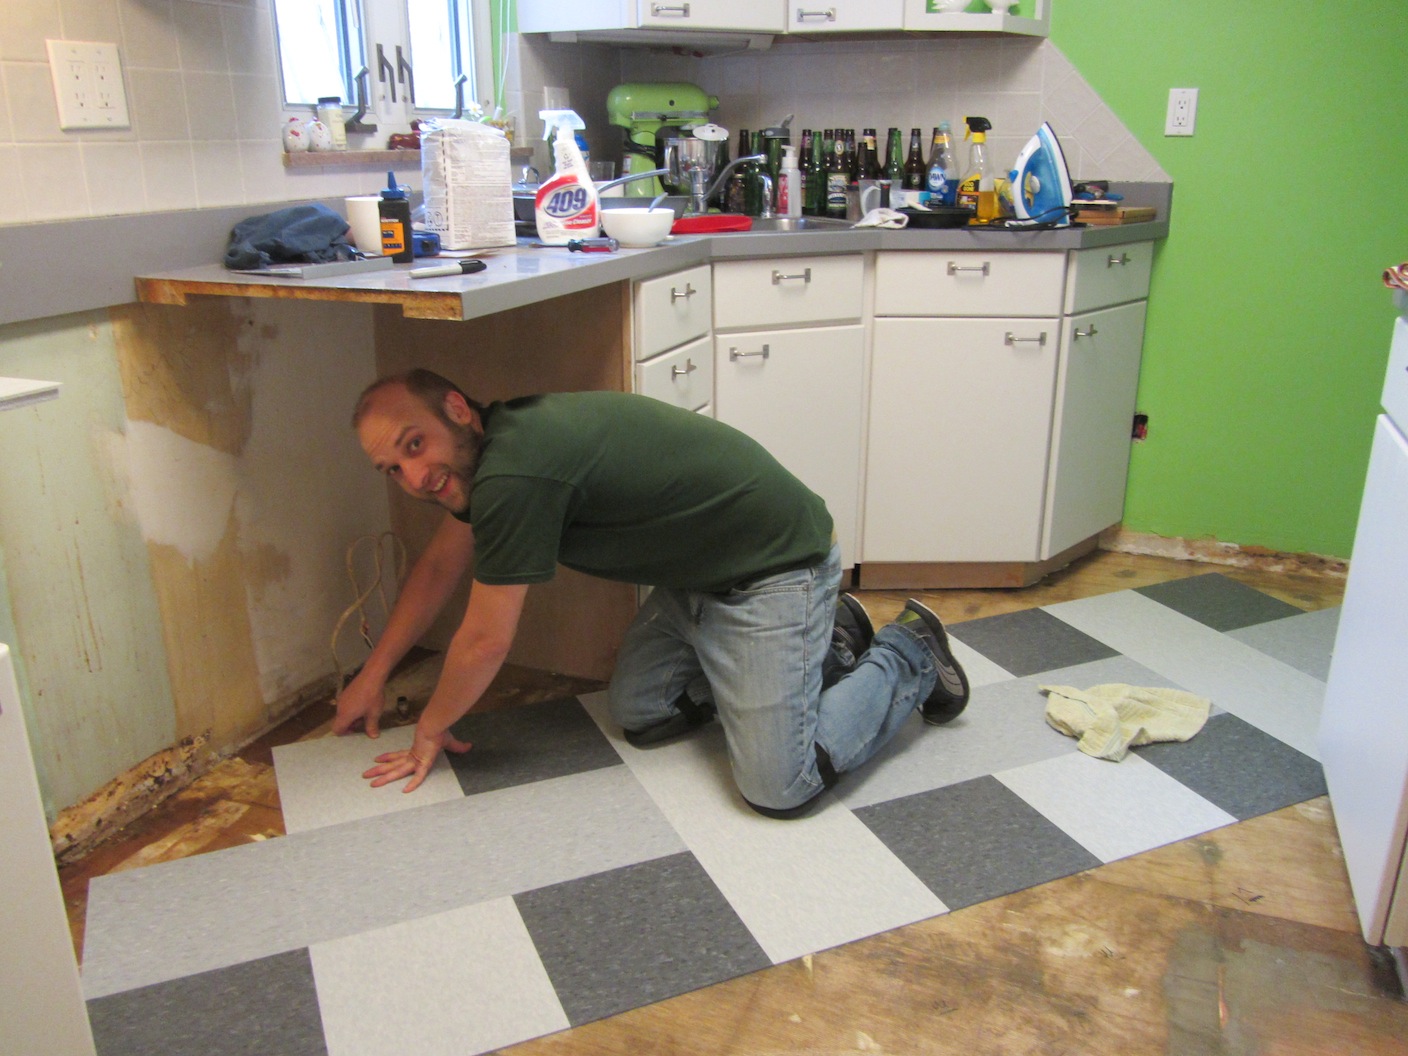
We started our pattern by just laying the first line of tiles along our chalk line. Kevin went straight down that line, laying the first tiles, then standing on them to lay the next, until he had a straight line across the kitchen. Then, he backtracked and laid down the next row to the side. Eventually, he broke this straight line pattern and just laid full chunks at a time.

Laying the new floor (as you can see, we went with a 3 tone muted grey color palette)
Laying the full tiles (ones that did not have to be cut) went down really quickly. We had nice system going on. We started with Kevin going around the house to the outside door and starting the floor from that end, working towards the entryway from the dining room. He took about 10 of each color tile with him.
As he ran out of tiles. I stood in the doorway of the kitchen and handed them to him – usually one at a time, sometimes a chunk of one color at a time. Whatever he needed or preferred. The main bulk of the floor (again, the ones that didn’t need to be cut), went down in about 20 minutes tops. We were starting to think this was going to be an hour project and done. We were grossly wrong.
It turns out, cutting tiles is time consuming. The best advice I can give you on that is to start with the easy cuts first and again pay attention to the pattern. A few times Kevin cut a tile and then realized he cut it with the pattern going the wrong way.
As for how he cut the tile, he consulted a youtube video. This one to be exact. I’ll let explaining how to cut be done by somebody who actually understands it. As I do not.
We didn’t buy the tile cutting tool, mainly to keep costs down. If we had to do it over again, we may have, but I believe it was somewhere between $30-50 at Home Depot. So keep that in mind when decided whether or not you just want to use the razor blade and snap method that we employed. I will say it seemed to work just fine, but it may have been more time consuming than the tool. No way for me to really know about that now.
After you get all of your tiles laid and your floor is completely covered, I’d highly recommend using a floor roller over top of them. We rented one from home depot for 24 hours and had plenty of time to spare. Its basically just a giant weighted roller on a stick and you push it around in all directions. It’s actually kind of fun. You can hear the air bubbles in the adhesive beneath the tiles popping. Kind of like a giant bubble wrap. Don’t run over your toe.
Now stand back and admire your work. Your/our new floor is beautiful.

Finished Floor
If you are anything like me, you’re obsessed with it. I am completely obsessed with it. I think it makes the kitchen look so much bigger. I’ll post more pictures of it soon. Truth be told, I chose this picture because all of the pics of it from right when we were done that show the whole kitchen also show Kevin’s extensive empty beer bottle collection. For Homebrewing. But it makes us look like huge drunks. Yikes.